Search This Blog

Sunday, December 29, 2013

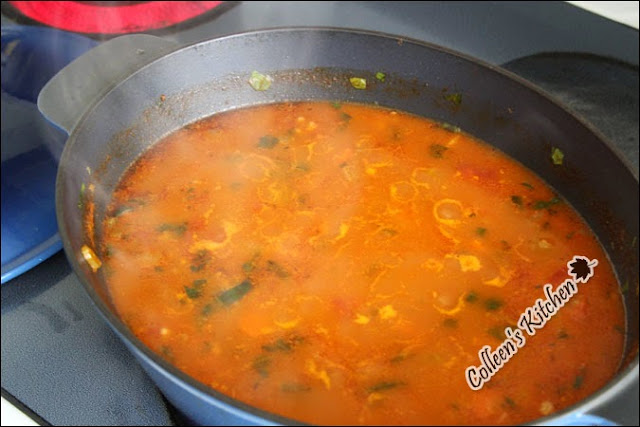
[Canadian Hamburger Soup] A family favourite soup that warms up a cold winter day

Like most people, I also make chili, stew, and soup more often starting from late autumn til the end of winter. One of our recent favourite soups is hamburger soup.  

It's a very Canadian soup, so it is not surprising that you've never heard of this oddly-named soup. Please don't let the name of the soup fool you. You only need perfectly normal healthy ingredients to make this hearty aromatic soup. Considering that it's a soup, it's thicker than a soup but not quite a stew so that you can call it a stew-soup or stoup :) This is a great soup that warms you on a cold winter day. You can make a potful of this soup as this freezes very well, only if there's any leftover. I usually make it for a weekend lunch for four of us which is composed of two adults and two kids, after which I have just a right amount of leftover for the lunchboxes for Mr. D and me. :)

I find that the very two essential ingredients for the hamburger soup are celery and tomato sauce. These two vegetables develop a deep rich flavour while being cooked. You can pretty much alter other vegetables as you like.

You can see my other soup recipes as below:

Here goes the recipe.
(loosely adapted from Heart & Stroke Foundation recipe)

Ingredients
1 lb extra lean or lean ground beef
1 large onion, peeled and chopped
1 garlic clove, minced
1 (28 ounce) can plum tomatoes
5 cups low sodium beef broth
1 cup tomato sauce
2 carrots, peeled and thinly sliced or diced
2 celery ribs, thinly sliced or diced
2 bay leaves
1 cup fresh baby spinach, chopped (optional)
1/4 cup fresh parsley, chopped (optional)
3-4 springs of fresh thyme or 1 teaspoon dried thyme
1/2 teaspoon fresh ground black pepper
1/2 cup barley (pearl barley or pot barley) or 1/2 cup spaghetti, broken
salt, to taste

Directions

1. Have all the vegetables get ready.

2. In a large dutch oven, brown meat. When meat has lost its pink colour, drain off any excess fat if there is any visible. If you use extra lean beef, there shouldn't be too much fat to discard. Add onion and garlic.


3. Add all remaining ingredients, except for spinach and parsley. When soup starts to boil, turn heat down to low so soup is barely simmering, cover, and let cook for 50-60 minutes
* You may add barley or broken spaghetti later if you don't want very tender barley or spaghetti. It's up to your preference. However, in that case, be aware that these carbs tend to absorb more liquid when cool. I prefer over-cooked barley for this soup, so I always add with all the other ingredients. 

4. Taste soup and add salt if necessary. Add spinach and parsley. 

5. Simmer for another 10 minutes.

Serve very hot!

Enjoy the warm sensation when you have a bowl of this hamburger soup!

Canadian Hamburger Soup

Tuesday, December 24, 2013

Merry Christmas!

I wish you a very merry Christmas and a superb new year!!!


Monday, December 23, 2013

[Vacherin mont d'or] A baked holy grail of French/Swiss raw milk cheese

We've not always been successful to buy Mont d'or for the past few years. It's all because of such a short period of time in December during which you can buy the cheese. Mont d'or is made with in the winter months when the cows come down from Alpage, petits Alps and there is not enough milk to make Comté cheese. It is packaged in round boxes and baked in its original packaging and eaten like raclette. 


As you might have seen my previous postings about cheese, I am a cheese lover. Especially I love cheese from French Alps since I lived there for some time many years ago.

Anyway, I was anxious and called Fromagerie Hamel of Montreal every week since last week of November. When I heard that Mont d'or finally arrived, we skipped Remi's basketball game on Saturday, and drove all the way to Montreal at -25 Celsius. As we couldn't get one last year, we bought two wheels of Mont d'or this year to compensate last year's miss! :) We had such a rich and fulfilling weekend, calorie wise! :( We had cheese meal two days in a row, raclette on Saturday and baked Mont d'or on Sunday. It was so delicious!!! Let me start diet from January 1st, okay? :) We had a smaller French Mont d'or first, since a smaller wheel gets more fermented more faster than a bigger one. We will have a bigger Swiss Mont d'or after Christmas. :) (Mon d'or's Shelf life(?) is really short).
Here goes the recipe, or preparation method, for Mont d'or. 


Ingredients
a Swiss or French Mont d'or in a wooden box
1-2 cloves of garlic, sliced
100ml Jura wine, or dry white wine
(as we couldn't find Jura wine from Ottawa or Gatineau (sigh...), we used a Pinot Gris from Alsace. I recommend an Alsace Pinot Gris or a  Savoie Jacquère. A substitute for a Jura wine would be wines from neighboring regions. :))

For the accompaniments
assorted delicatessen
mini potatoes 
cornichons (French sour pickles)

Directions

1. Preheat the oven to 375 Fahrenheit (190 Celsius). 


2. Remove the lid from the cheese box. Cover the box with aluminium foil.
3. Make several slits in the top of the cheese with a sharp knife


3. Place the garlic slices into the slits. Submerge them completely into the cheese.
 
4. Scoop out a big scoop of creamy cheese to make a hole in the middle.
(Don't fight over the scooped cheese :))


5. Pour the wine.


6. Place on a baking sheet and place in the oven for 20 minutes, until melted.


It' ready, hot and bubbly. :)


To serve, place the cheese box onto a serving plate.


Enjoy the melted cheese just like raclette, with steamed hot potatoes and assorted delicatessen. :) 


It disappeared fast! The boys love cheese just like their parents.

Happy Monday!


Baked Vacherin Mont d'or

Wednesday, December 18, 2013

[Slice-and-Bake Sugar Cookies] Versatile Cookies for Any occasion - Easy to make

I was asked to bring some treats to share at the refreshment after the kids' Christmas recital of their music school. There were different things you could bring, but I obviously picked baked goods as I love baking. :) I baked my signature eggnog cake and made a couple dozens sugar cookies. I know that I call so many things my signatures. But, I can't just pick one! You can see my 'signature eggnog cake' recipe here:
http://heavenlypalate.blogspot.ca/2012/02/eggnog-cake-german-eggnog-cake-that.html

There are thousands of sugar cookie recipes. Sugar cookies are easy to make. Some decorations may be tricky.  But, usually simple sprinkles are enough. I've been subscribing Everyday Food for a few years. Now it became an appendix(?) to Martha Stewart Living, but it was a separate publication until last year. I've kept every single issue of this small magazine, but one of my favorite ones are the special issues for holidays. Especially 'Holiday 2006' edition - Collectible cookie edition is the one I use the most.


I like making sugar cookies since they are such versatile treats that can be decorated in many different ways. I rolled the log over the sprinkles this time. It takes one minute to decorate, but the plain sugar cookies transform into Christmas sweets!

Here goes the recipe for the Slice-and-Bake sugar cookies.
(Adapted from page 38 Everyday Food, Holiday 2006 edition)

Ingredients
(makes 24. You can simply double the recipe to make more!)
1 + 1/2 sticks (12 tablespoons) unsalted butter, room temperature
3/4 cup sugar
1 large egg yolk, room temperature
1 teaspoon vanilla extract
2 cups all-purpose flour
1/2 teaspoon salt
sprinkles or sugar (optional)


Directions

1. With an electric mixer, beat butter until light and fluffy, scraping bowl as necessary.

2. Add 3/4 cup sugar, and beat until combined.

3. Beat in egg yolk and vanilla.

4. Add flour and salt and beat until combined. Don't over-beat!


5. Transfer dough onto a piece of parchment or waxed paper. 

6. Using the paper so dough won't stick to your fingers, roll into a log, about 2 inches in diameter.

7. Wrap well, and twist end of paper to seal. Refrigerate until firm, at least 60-90 minutes. I usually make the dough ahead and refrigerate for a couple of days. You can leave the log in the fridge upto a week, or freeze up to 3 months in a resealable bag.

8. Preheat oven to 350 degrees Fahrenheit (or 180 degrees Celsius).

9. When ready to bake, roll the log in the 1/2 cup red or green decorating, if desired, to coat.

10. Slice the log into 1/4-inch-thick discs.

11. Place on a baking sheet, and bake until golden brown, about 15 minutes. I overcrowded the baking sheet since I had too many to bake, but if not, please don't overcrowd the sheet. 

Otherwise you will end up with the misshaped cookies stuck with each other, like mines:(

12. Let cool 5 minutes, then transfer cookies to a wire rack to cool completely.

They are crumbly and heavenly :)

Enjoy!

Slice-and-Bake Sugar Cookies

Thursday, December 12, 2013

[Gingerbread house] Yearly Family Tradition + new balls for Christmas tree

Every December, we, or rather they, decorate two gingerbread houses, or one gingerbread house and a gingerbread train. We've been doing it every year since Remi was two, to make this year the 8th consecutive year to decorate a gingerbread house. Since Remi and Pablo have two different personalities and style, they cannot share a gingerbread house. We realized it already a few years ago when Pablo joined the activity! That's why we ended up buying two gingerbread houses every December. And of course, this year was no exception.

Remi is a perfectionist. He plans his pattern and takes time to decorate his house(?) of the year. 

He is usually good and almost never eats any decorating sweets before he is sure that he has enough to decorate.

My favorite part of Remi's house is chimney! Isn't it a good idea?

On the other hand, Pablo is very far from a perfectionist. 

His forte is decorating his house fast, maybe too fast :( And, while decorating, he eats decoration sweets at the same time. It's so quick that you can't even stop him. :( 

Well, at least, I know that he didn't eat too much since he had enough sweets to decorate the entire house.


And last week, we finally bought and decorate our 2013 Christmas tree. Mr. D took a few photos.

We have a few new ornaments every year. 

These names balls are the four of the new additions of this year. which we bought in Lancaster, PA last October. If you want to see our trip to Lancaster, Pennsylvania,
see the links below:

2013 Trip

2011 Trip

Some ornaments have very fond memories. Every year, precious memories will be added along with new ornaments. :)

The photos below are the ones Mr. D took at his work. I love Christmas decorations in the office.  :)


I hope we can keep this family tradition for very long time even after the boys grow up so that we can build and decorate a gingerbread house with our grand kids.

It's almost Friday.
T.G.I.F.


Gingerbread house and Christmas tree