Search This Blog

Thursday, June 28, 2012

[Barbecue Grill] Gas grill rule #1 & Morning Barbecue

We realized just a month ago that we had been real novices about barbecue grill.
   
Having researched about barbecue grills, we understood why it had taken so long for our grill to grill steaks!!!
Good barbecue grills grill perfect steaks in 8 minutes~
And good gas barbecue grills are expensive!!!!
But, in the world of the barbecue grills,
there is an adage every barbecue king-wanna-be should remember:
YOU GET WHAT YOU PAY FOR!
Sadly, we learned it after struggling with $200 cheap grill for over 5 years. :(
And now we know that this kind of gas grill is for grilling burgers and hot dogs.

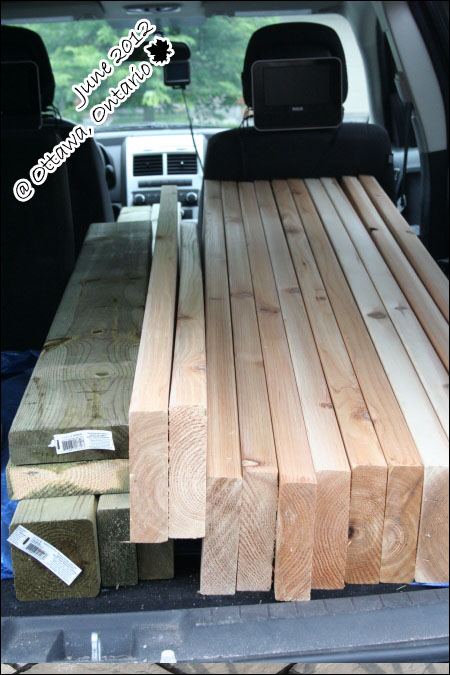
Now, we have a quality gas grill, even though we had to get a smaller size to buy within our budget.
If you want to learn more about gas grills,

I didn't take the photos of hamburgers and kebabs Mr.D made last weekend.

But, I remembered to take the photos of bacon cooked on the griddle.
We had a breakfast in the backyard last Saturday.
Did I say before that I loved bacon?
I think bacon is one of the top reasons I will never be able to become a vegeterian.


As Pablo doesn't like bacon, he had dooughnuts from Timmy's.
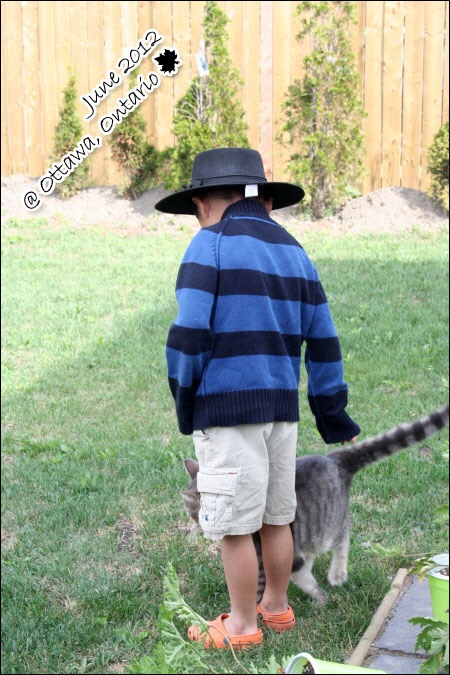
Pablo was wearing an Amish hat for the breakfast.

There was breeze and sun in the morning~
It was a perfect fresh weekend breakfast.

These are the baby tomatoes growing in my raised bed garden! :)
I will have plenty tomatoes. I can't wait.

Ayrton is our neighbor Sarah's cat.


He likes our backyard so much that he often stays in our backyard.


We will probably never have a pet, which I feel sorry for my kids.
I am grateful that Ayrton loves our backyard and comes daily so that kids could pat and hold him.


My kids like not only pets, but also stuffed animals.


Especially Pablo needs a stuffy wherever he goes.
My kids have at least forty stuffies each, and this number is still growing. :(


We started to consider him our shared pet. (Sorry Sarah~)

 I like animals as far as they don't come closer.


I was so glad that my kids like animals unlike me.

On the contrary, Remi and Pablo always want to pat animals like their dad.


He loved the milk kids gave him.


This is another cat of Sarah.
We find him in our backyyard almost every morning.

Pablo wrote the words on the driveway.
He practiced the words he had learned by heart the day before.
I think it's a decent hand writing for a 5-year-old kid.


It was a perfectly peaceful Saturday morning~ 


Brand New Barbecue Grill

Thursday, June 21, 2012

[Devil's Food Cake] The most chocolatey cake in the whole wide world

I think I've been baking this Devil's Food cake for, at least, each of Mr.D's birthday for past five years.


I guess it became one of our family traditions.
Devil's food cake is a beautiful tall cake with a strong rich chocolate flavour. That is why this cake is one of my favorite cakes, but also this is why I am reluctant to bake it often.

I love it so much that I gobble up two or three slices easily. It can be called a chocolate decadence.
You understand why it is called "Devil's food" cake as soon as you have the very first bite.
A forkful of cake attacks my palate first with its dark chocolate taste, then brings about sensations as it passes by.


Kids look forward to their dad's birthday, mainly because of this Devil's food cake.
Devil's food cake was introducedin the early 20th century and the first printed recipe goes back to as early as 1905. (Source: Judith M. Fertig, All-American Desserts: 400 Star-Spangled, Razzle-Dazzle Recipes for America's Best Loved Desserts.)

I've been using MarthaStewart.com's recipe even though I've wanted to try Jamie Oliver's recipe some time. I think I wrote it before, that I find the recipes that use weights instead of measurements very inconvenient. That would be the main reason I've never tried Jamie Oliver's Devil's food cake recipe.
Anyway, I've been content with the recipe I've used.

Here goes the recipe I almost swear by :)
(Source: Martha Stewart Living)
 
 
 Ingredients
<Cake>
 1 1/2 cups (3 sticks) unsalted butter, plus more for pans
 3/4 cup Dutch-process cocoa powder, plus more for pans
 1/2 cup boiling water
 2 1/4 cups sugar
 1 tablespoon pure vanilla extract
 4 large eggs, lightly beaten
 3 cups sifted cake flour (not self-rising)
 1 teaspoon baking soda
 1/2 teaspoon salt
 1 cup milk
<Chocolate Frosting>
24 ounces Nestle semisweet chocolate morsels
 4 cups whipping cream
 1 teaspoon light corn syrup
How to make:
 1. You need to make frosting first since it takes time to have it cooled.
Place chocolate morsels and cream in a heavy saucepan. I am too lazy to chop chocolates, and thus I use semi-sweet chocolate chip bits.
Cook over low heat, stirring constantly with a rubber spatula, until combined and thickened, between 20 and 25 minutes.
Increase the heat to medium low; cook, stirring, 3 minutes more. Remove pan from heat.
2. Stir in corn syrup. Transfer frosting to a large metal bowl. Chill until cool enough to spread, about 2 hours, checking and stirring every 15 to 20 minutes. I leave the bowl submerged in the cold water. Use immediately.
3. Heat oven to 350 degrees Fahrenheit. Arrange two racks in center of oven.
4. Butter three 8-by-2-inch round cake pans or 8-by-8 square pans. I used one 8-inch round pan with two 8' x 8' square pans. (who has three same size round pans?)
 Line bottoms with parchment. Dust bottoms
 5. Sift cocoa into a medium bowl, and whisk in boiling water. Set aside to cool.

 6. In the bowl of an electric mixer fitted with the paddle attachment, cream butter on low speed until light and fluffy.
7. Gradually beat in sugar until light and fluffy, scraping down sides twice. Beat in vanilla. Drizzle in eggs, a little at a time, beating between each addition until the batter is no longer slick, scraping down the sides a couple of times.

 8. In a large bowl, sift together flour, baking soda, and salt.
9. Whisk milk into reserved cocoa mixture.
10. With mixer on low speed, alternately add flour and cocoa mixtures to the batter,
starting and ending with flour mixture, i.e. 1/3 flour mixture - 1/2 cocoa mixture -1/3 flour mixture - 1/2 cocoa mixture -1/3 flour mixture.

 11. Divide batter evenly among the three prepared pans.
 
12. Bake until a cake tester inserted into center of each layer comes out clean, 35 to 45 minutes, rotating the pans for even baking.
Transfer layers to wire racks; let cool, 15 minutes. Turn out cakes, and return to racks, tops up, until completely cool.

 13. If you use the three same round pans, you can skip this step.
But, if you used different sized pans, cut the cake sheet using the round cake ring without bottom as a cake cutter.
Remove parchment from bottoms of cakes. Reserve the prettiest layer for the top. :)
Well, actually it doesn't really matter once you spread frosting :)
 14. Place one cake layer on a serving platter; spread generous amount of chocolate frosting over the top. Add the second cake layer, and spread with frosting.
 15. Top with third cake layer.
I touched to give some rough spiky texture. It's just an option.
Cover outside of cake with the remaining frosting. 
I always end up with lots of frosting which I put over the top and side of the cake.
I spread the frosting at 5 a.m.!! since the frosting was not firm enough to be used.
Now it's ready to be served :)
 
 This was the shot just before sticking candles in the cake.
We celebrate a birthday first at breakfast.
(Oh, by the way, the number of candles is totally irrelevant of the age.
For an adult's birthday, we use all the candles left in the package~
Of course it's a different story with the boy's birthdays. We light the number of candles that matches with their age.)
We have a super sweet breakfast on a birthday :)
 It's Mr.D's birthday, but still kids love to take a turn to blow candles.
 Warning; It's really seriously good.

Enjoy!


2012 Devil's Food Cake

Tuesday, June 19, 2012

[2012 Patio Project] DIY patio at our backyard~

I now have a patio and a picnic table.
It took over 3 weeks for Mr.D, majorly because of Lowe's poor inventory system.

You may be curious how I got a brand new patio in this Spring.
   
Before the end of the winter,
I suddenly decided to grow vegetables in our backyard, and asked Mr. D to make me a raised bed vegetable garden.

Mr.D put up some resistence,
but finally agreed to make it only if I let him make a small patio first.
Well, as an exemplary good wife, I let my husband do what he wants to do.
(My husband is self-made DIY man.
He removed our old kitchen cabinets and sold them at Kijiji
and installed a new kitchen.
He fenced our backyard as well)

This is the "original design" what Mr. D drew at the beginning of the patio project.
Different colors meant different sized patio stones.
After the project was launched and turf was removed, we realized that we needed to extend the patio by at least 3 feet.
So, the final version of our patio is bigger than the sketch above.
First the turf needed to be removed before the patio edging could be done.

Believe me, installing patio edges is easier than digging out turf.
It cost us a fortune to get rid of sod and soil.
Remi is always eager to give a hand, which is not very helpful all the time. :)
Thirdly, landscape fabric was spread to prevent any potential weed.
Fourthly, a layer of gravel was paved. Mr. D used riverwash stone, but you can use cheaper any gravel. We had had five different items to be delivered while a dump truck could deliver only two items at a time. To save that $80 of delivery, we used more expensive riverwash stone instead of gravel.
Fifthly, a layer of crushed stone was spread and tramped.
Now the patio base is almost ready.
Sixtly, playground sand were spread for the leveling.
Finally, patio stones were to be placed, according to the original drawing.
The most important thing, at least for me, was my raised bed garden.
Mr.D made the frame with the lumber.
The raised bed was filled with top soil.
My raised bed garden has 24 square-foot spots to plant vegetables.
  
Mostly, they were chatting and playing while Mr. D was hard working.
9 of 24 squre-foot spots are occupied with tomato plants I had germinated in April.
And I have arugula(rockets), lettuce, chive, basil, parsely, cucumber, sugar snap peas, green beans, spinach, and two raspberry bushes.
At this point, the patio is almost ready to be used.
Once the patio stones were all set, the cracks/space between stones were filled with jointing sand.
 Tara~ Our patio is ready :)
Edges were covered with riverwash stones.
However, it was not the end for Mr. D.
He was dreaming of making a picnic table.
He said he would make me a picnic table in two hours.
Alright, then. I don't use a veto on such a desire.
Instead of a patio set,
we went to Home Depot to buy lumber.
Mr.D was all excited to make a picnic table.
I didn't bother him.
Remi and Pablo helped out their daddy.
 Mr. D, making table legs.
 Table was made in less than three hours.
Mr.D said it was very easy to make a picnic table.
Well, maybe not really.
But, compared to the DIY patio, a DIY picnic table looked like a piece of cake.
Then, we hung a IKEA canopy we had bought.
I think it looks good.
What do you think?
Pablo is doing his writing of the day at the brand new picnic table.

This was our patio project.
I can't believe that there always are something to do in the frontyard and backyard.
We, or rather Mr. D is attacking the sidewalks from the portch to backyard.
We hope it be completed before the end of June.

2012 Patio Project